
What ClickUp features make difference? ClickUp is one of the great project management software for small businesses to large enterprise teams. Beyond mastering the basics, this application offers a range of capabilities to enhance your teammates’ continued productivity.
Knowing where to begin might be difficult when so many options are available. Which features are useful to you and your team members, and which ones are just extra steps? If you want to know more about the best ClickUp features to use, keep reading.
1. Statuses
Do you want to communicate with your coworkers and inform them current project position? ClickUp’s statuses are helpful features to update team members about the progress of a project. ClickUp groups list by status by default. Tasks are moved to the appropriate group as you change the column.
To-do, in-progress, and complete are some of the most typical statuses, and you can be creative and modify them to whatever suits your workflow.
Stuck — to demonstrate that a team member needs assistance.
On hold — used to indicate that something is ongoing but temporarily halted.
In review — to show that the job is in the hands of another person.
Up next — to inform people of your future move is the next phase.
Active, Done, and Closed are the three basic status types in ClickUp. You have tasks that are in the active status. Your lists will still have done statuses, but ClickUp won’t show that they are past due. Closed hide the projects you have finished.
2. Table View
ClickUp provides a variety of views to help you keep organized. Table View is the way to go if you want a quick peek at the projects in a List. To find it, go to the top-right corner of your List and choose Add View, then Table.
When you select Add View, your List will appear as a simple table, similar to what you’d see in Google Sheets. You may still work with your columns within the table, just as you can in List View.
3. List View
Your ClickUp Lists are displayed in List View by default. If you prefer to keep things simple, this and Table View are your best choices.
This is one of the Views where you can organize your tasks by status, assignee, priority, tags, due date, or anything else you want to customize. List View will allow you to overview current projects and everyone’s workload.
4. Due Date Column
The Due Date column serves a purpose more than simply communicating deadlines. When you enter information into the People and Due Date sections for a job, ClickUp sends it to the assignee’s My Work section under Home.
You’ll also get notifications about future deadlines and overdue projects. Furthermore, by switching to Calendar or Timeline View, you may see your workload by date.
Read also: 10 Best Project Management Apps for iPhone and Android
5. Home Tab
LineUp, Trending, and My Work can be found under the Home option in ClickUp’s sidebar. LineUp keeps all of your top jobs for easy access, Trending highlights the assignments you’ve worked on the most that day, and My Work includes a To-Do page with an automated to-do list.
Within the automated list, the tasks are organized as follows: Today, Overdue, Next, and Unscheduled. You may rapidly open assignments to inspect them, adjust their status or priority, change the deadline, or delegate them to someone else from this page.
In addition to To-do, there are three other tabs:
Comments — to stay up to date on the latest exchanges.
Done — to review finished chores.
Delegated — If you have the Unlimited plan or higher, you can use Delegated to send reminders for items you’ve handed off rapidly.
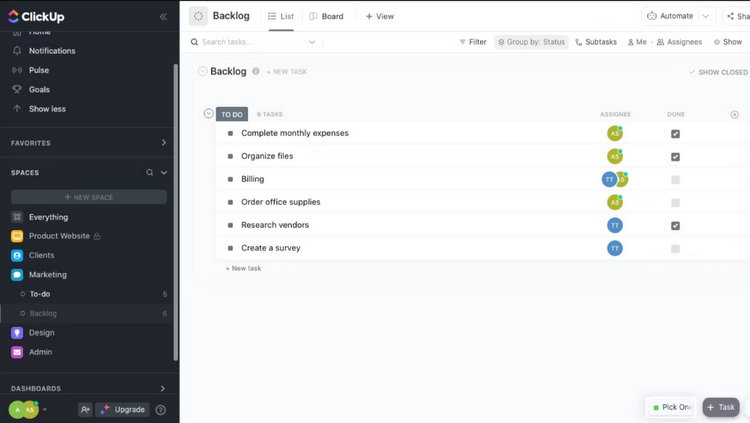
6. Checkbox
The Checkbox is one of the essential ClickUp features you need to use. The checkbox column offers to keep things super simple with a checklist. To add it, click the add symbol in the top-right corner of a group and choose the Checkbox from the New Column menu. If you’re working on a to-do list with someone else, including a People column. This will assist you in avoiding overlap as you divide and conquer.
7. Comments
ClickUp provides numerous opportunities for you to communicate with your coworkers. By far the most straightforward is the comments.
You discuss the information online, and it takes you a long to find them afterwards because you’re not sure if it was in an email, your company’s messaging app, or a text.
You and your coworkers will know where to find the details each time you ask questions and discuss details in the comments section of a task in ClickUp. By clicking on a task, you may see the comments area.
You can do the following:
- Assign comments to others.
- Mention others.
- Pull up a task.
- Insert emojis.
- Use slash commands to add formatting.
- Record your screen.
- Create new documents.
- Add files.
8. The People Column
The People column shows who owns a task. To add more than one individual, go to your ClickApps settings and enable Multiple Assignees.
You can do so by going to My Settings, selecting ClickApps, and scrolling until you locate the Multiple Assignees option.
To avoid overlap, assign only people who are currently engaged in a task. You can add others as Watchers by clicking the eye symbol in the task card’s top-right corner.
9. ClickUp Description
You can add a description in any way you desire to structure and personalize it. So, you can give as detailed as possible when allocating work to someone else or taking notes for yourself.
Accessing the Description part, which appears when you click on a task, essentially replaces email because you can enter all your information here. Select a coworker’s profile in the People column to include them in the conversation.
Conclusion
The features offered by ClickUp go much beyond those mentioned in this article. Conversely, this roundup will help you get the most out of the software, especially if you’re just getting started.
Read also: 4 Easy-to-Use Business Management Applications for Small Businesses
